Red Petal Bastion
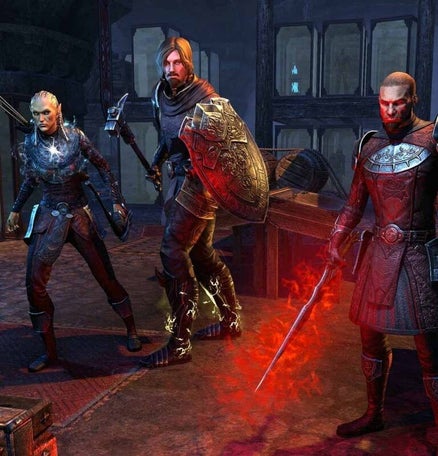
the Red Petal Bastion Dungeon. The video guide is demonstrated with one tank, one healer, one stamina dps, and one magicka dps, so that NO role is left out, meaning ANY player can slot into this scenario/group composition. All of the mechanics are demonstrated and explained INCLUDING secrets and hardmodes!
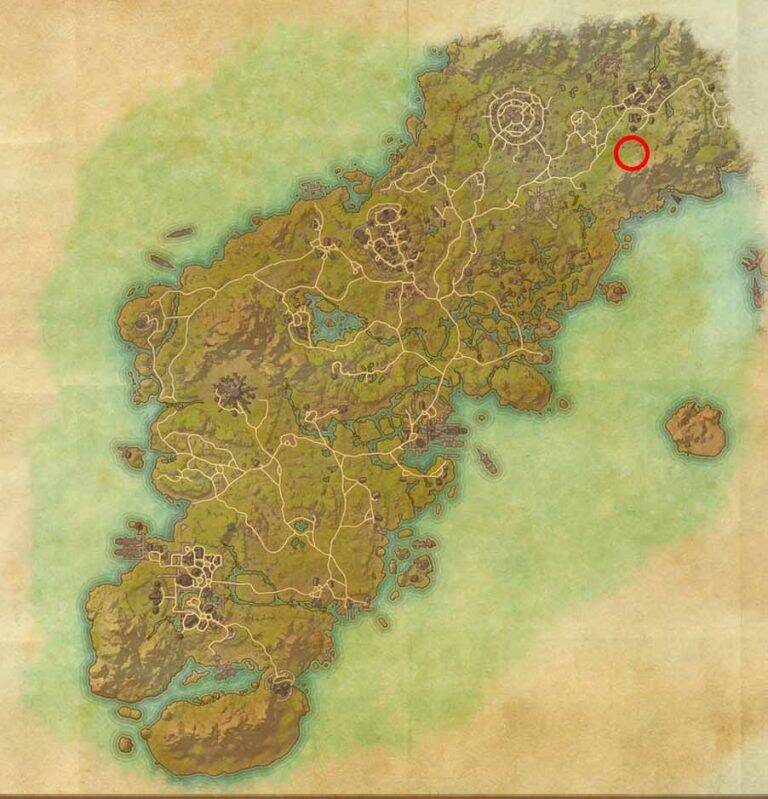
This dungeon you will have access to in the dungeon finder at level 45. However if you travel to it directly you can go in at any level. This dungeon is located in the Gold Coast as shown on the map below left.
The bosses are marked on the map below right with their names and locations. This Elder Scrolls Online Dungeon Guide will explain all you need to know about the mechanics as well as offering possible strategies for you to apply in order to defeat them.


boss fights
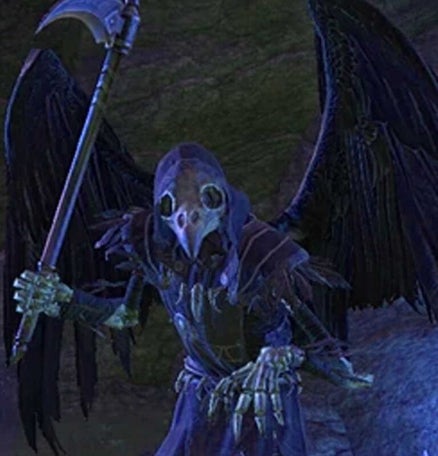
Wraith Of Crows (Secret Boss)
As shown in the video this secret boss is pretty straight forward. You have two waves of adds.
The first wave is 3 adds and the next one is 5-6 adds.
The tank should be sure to hold them all still and together with them turned away from the group. Once they are killed you will have to fight the boss.
Crow Storm – The boss will pick ONE random player and cast a crow storm aoe at them, if you stand in this you will die, so you will need to kite (move around avoiding it) away from the group until it has gone.
Dark Bolts – The boss will cast almost dark magic like abilities under each player which will quickly POP and do damage under them. Avoid these by moving or simply block
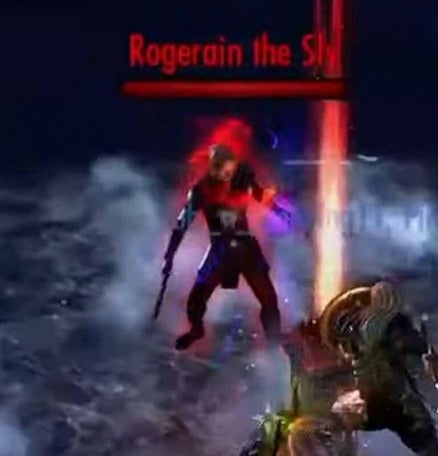
Rogerain The Sly
This boss looks a lot more chaotic than it is but it is up to you how difficult you make it. If you follow basic mechanics it will be a breeze, if not you may get overwhelmed. The trick to this boss is to rid the room of ANY adds. Do that and you will make this 10x easier on yourselves.
The tank should position the boss in the middle of the room or in a static spot as and when possible and simply hold him still. There will be mechanics where moving is required but you should be able to keep him in the same local area for the most part.
BIG BOOM! – Very simple this one, the boss will cast a HUGE aoe under his feet. Simply DON’T stand in it. Also it will emit up to 8x individual aoes from inside of it and they will fan out across the floor at the group. All you have to do is move your feet left or right to avoid them. The amount of stuns and damage going on from these mechanics can be quite problematic so always be aware of this ongoing attack.
Lightning Winds – ?The boss will cast small winds of lightning in front of him, block these or avoid them, they don’t hit hard but safer to take less damage in the fight than MORE!
Heavy attack – Very simple, if the boss heavy attacks the tank, block it. If the tank has lost aggro for whatever reason and it aims at a dps/healer, be sure to dodge it or die!
Frogs! – During the fight the boss will spawn frogs! These are simple adds with small aoe attacks and direct attacks. These should be killed as soon as possible to lessen the chaotic style of the fight and keep things simple. They do not have a lot of health and CAN be chained and/or stunned so be sure to make these a priority when they are around. Remember too many stacking mechanics is what causes problems, delete them!
Poison splats! – The boss will make multiple small and LARGE poison splat time blobs fly around the room and land in random locations and/or on players. If they are on the floor of course don’t stand in them. If they are aimed at a player, the aoe will spread then pop. Much like in many other dungeons for ice comet like effects, these will need to be blocked in a safe open space. Do NOT stack them.
Daedric Portals – These Portals will be spawned by the boss, usually in the corners of the room so keep your eyes open. When they spawn you need to kill them. The longer they are up the more enemies will come out of them.
generally they spawn Flesh Atronachs, Daedra Spiders and Watchers. These MUST be killed but the Portal takes the priority first to stop them coming through. Adds are always a primary target in this dungeon so while you can manipulate their position to fight the boss at the same time, you should still focus all adds OVER the boss.
Order of priority is simple.
1) Portals
2) ANY adds
3) Boss.
It doesn’t matter how long it takes, just be sure you do this or you will end up overwhelmed. If you also do not get rid of the portal in due time, another will spawn and so on. Making it really tricky.
YOU ARE THE GOAT! – That’s right!! The boss turns you into a GOAT! One player at random (usually not the tank unless it drops the taunt) will be turned into a goat and the room will be filled with Sweetrolls. As the goat all you have to do is run around and collect these to help the group. You help them build ultimate, increase damage, increase healing, and heal for each one you pick up.
Once the timer is up you return back to your original form.
One more major bonus is that if you charge the portal as a goat, you will do MUCH more damage to it and save it from causing you problems in the fight.
Hardmode – This is a basic hardmode. The fight is exactly the same but he has a LOT more health and hits a little harder. Give it a go, you can do it !
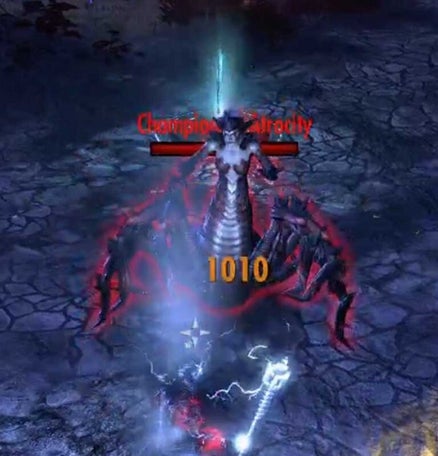
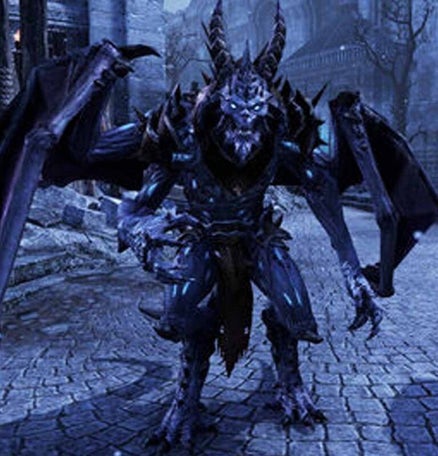
Spider Daedra (Secret Boss)
As shown in the video this secret boss is pretty straight forward. You have two waves of adds.
The first wave is 3 adds and the next one is 5-6 adds.
The tank should be sure to hold them all still and together with themturned away from the group. Once they are killed you will have to fight the boss.
Heavy attack – This mechanic pretty self explanatory, block it!
Spit – The boss pick one player at random to spit at, exactly the same as the last boss in Spindleclutch I. So long as you stay spread out you can see who she is targeting. All you need to do is dodge roll to avoid it.
Lightning – Two players at a time will be targeted with a lightning strike. You have two options here, dodge it or block it. The choice is yours.
Eliam Merick, Liramindel, Ihudir
This boss VERY mobile! The tank should hold the boss as still as possible at all times while trying to have him aimed away from the group, preferably towards a wall. The boss WILL need to move around alot so be sure to maintain a taunt at ALL times and keep up your resources else it will get tricky.
Heavy – Basic hits for the tank to deal with, be sure to block.
Sparta kick – This mechanic is a BIG problem and teaches you about the last boss too. The boss will KICK the tank and also emit some ground based aoe in the direction he kicks. So be sure to have this turned away from the group.
The problem with this is while it can be BLOCKED it will STILL knock you back anyway making you open to the next attack.
You have two options. Block it and be SURE you are ready for the next mechanic, OR you can dodge roll it. However be sure that you try to maintain some sort of control and don’t move around too much while the dps are trying to hit him because it will take you a LOT longer!
Lightning! – The boss will spawn small and large lightning aoes on the ground, this can get quite hectic so be sure to avoid them at all costs regardless of role. Don’t panic, just don’t stand in them.
Charge! – During the fight the boss will charge at the tank (hence why you should face towards a wall), This can be blocked or dodged but if you fail you will be run down and take HUGE damage. DPS and Healers will die so do not get caught.
JUMP! – This is an old school mechanic for many of the base game bosses, but you get to see it all over again here. Simple rule. If you stay close to the boss, he won’t ever use this ability. If you are too far away he will jump on your head with a MASSIVE impact aoe. If you dodge it you will live. If he hits you, you will die. Be careful, watch your distance.
Mini Bosses – At 80% The boss will spawn the Archer add. This is simple, she has light attacks, teleports around the room and has a nasty cone attack which you should avoid.
Stack the boss ON her head and kill her, and she will be incapacitated for a short while before she returns to the fight.
At 50% the Melee mini boss will come in. He will teleport to long distances and channel, if you don’t interrupt him he will do high damage and has the ability to enrage the enemies in the room.
The trick to this is to interrupt him but move as a group to NOT allow the boss to do his JUMP chasing down long ranged players.
Stack the boss on him and kill him as and when you can and he will sit down for a while before coming back to the fight.
At 30% however the boss will respawn BOTH of the adds and you will have to kill them again or just focus the boss. The choice is yours!
it’s easier to kill them first then finish the boss but it depends on your group and control of the adds. If the tank cannot maintain taunts on all 3, it can get tricky.
HARDMODE! – On hard mode ALL of the mechanics are the same BUT there are a couple of twists.
Firstly the boss has a LOT more health, which is pretty standard for Hard modes.
Secondly the Archer will actually keep a shield around the boss while she is alive, hence why it is important to kill her. The boss will take MUCH less damage while the shield is active.
Also at Execute (around 30% or so) When the two adds come back into the room, they CANNOT be killed, they will out heal everything you do. So the tank MUST manage them.
During the original PTS cycle of the Walking Flame DLC these could be killed on hard mode much like they can on regular veteran. However they changed it upon release and NOW the execute is deliberately more difficult.
Maintain taunts, interrupt when necessary and keep doing what you are doing! nothing changes from here!
Grievous Twilight
As shown in the video this secret boss is pretty straight forward. You have two waves of adds.
The first wave is 3 adds and the next one is 5-6 adds.
The tank should be sure to hold them all still and together with them turned away from the group. Once they are killed you will have to fight the boss.
Heavy Attack – The boss will Heavy attack the tank, this is simple, Block it.
Machine Gun – The boss cast a constant wave of energy balls at a random player, exactly the same as Lord Warden from Imperial City Prison. All you have to do as a tank is physically get in the WAY of it and block. The target should stand still.
Meteors – Also like lord warden, meteors will fly from the sky. This has a slight twist though, instead of ONE which all should avoid, he casts one per PLAYER…Block it or dodge it but of course due to the nature of this skill, you should NEVER stack up in this fight.

Prior Thierric Sarazen
The Final boss, has LOTS of staggering mechanics but if you have paid full attention to everything so far, he is NOT that bad at all. It’s mostly foot work and prioritizing targets.
The BOSS is NOT your main priority. There is NO dps check at all. Just be sure to kill the ADDS first.
The tank should hold the boss STILL, preferably mostly in the middle of the room if possible, doing so will save you complications later on, but it is a very mobile fight so it’s not the end of the world if he is in other places sometimes, so long as he is standing still.
DO NOT run around like a headless chicken, you WILL die!
Sparta Kick – Exactly like the last boss, you fought, he will kick the tank with a ground based aoe following it. This is blockable or dodgeble. The risk to dodging is that you start running around too much. The risk to blocking is that while blocking he will STILL nudge you back leaving you open to the next attack. Do whatever works better for you but be READY for his next hit, it IS fast!
Heavy Attack/Cleave – Pretty straight forward, usually straight after the Sparta Kick, he will hit with a really wide frontal cleave swinging his weapon. He does have a shadow version of himself during these times especially on hardmode so it is kind of a double hitter. be sure as the tank to block this and as DPS and/or healers be sure to stay BEHIND him. Blocking it as the tank is fine, getting hit as anything else is dead mode!
Ground Spikes – The boss will stab his sword into the ground channeling. During this time each player will have a small aoe pop under their feet 4 times. Each one contains a spike that will come up from the ground and hit you for huge damage. The trick to this is to move in a tiny circle to place them on the ground until they have all gone and then resume the fight. Each player has their own so do NOT over lap. It’s very simple to the fanning out type mechanic from the lighting in Asylum Sanctorium.
Teleport Spike! – The Boss will teleport across the other side of the room, and one player will have a small marker under their feet. This player is marked to die. You MUST interrupt the boss. If you do not do it in time, the marked player will be stabbed from under the ground with a spike (like cradle of shadows last boss velidreth) and be killed with a one shot. No you will not survive it, it will hit you for about 300-400k. Don’t be lazy, interrupt the boss!
ADDS – This is essential! During the fight MULTIPLE adds will spawn in the room from the sides. Small daedra that should be dispatched quickly, but also you will have some rather large Nords channeling all manner of nastiness at the group. These MUST be your primary focus, they must be taunted, they must be interrupted and above all they MUST be killed. If you don’t kill every add you see you will get overwhelmed. The adds will continuously stack and you will have too much to deal with. The add spawns are quite far apart so once they are dead you generally have a “you vs the boss” moment for quite a long period of time.
Kill the adds, THEN the boss, don’t go yoloing and die!
Even in the video we could have finished the boss, but sometimes it is not worth it. There is NO dps race, kill the adds, the boss can take as long as you like.
Healing circles – The boss will cast BIG healing circles in the fight, these will heal him and damage you, don’t stand in them and don’t let HIM stand in them.
Stun Walls – Around mid way into the fight the boss will start to spawn walls of AOE ball that slide across the floor from a random direction. There are GAPS in these so watch your feet and look for the gap. If you get caught you will take high damage, be stunned and then open to other attacks.
NOTE: This is why we tank the boss in the middle as often as possible, that way you can see the walls much earlier. If you hold him on the corner or the wall then they could spawn on your face!
These usually happen in waves of 3-4 and then they will stop for around a minute and then happen again. Once they are introduced to the fight it is a stacking mechanic you must now constantly deal with.
Blade Tempest – At low health now you have all of the above mechanics dealt with , he will cast multiple big red SLOW moving whirlwinds in the room. These are easier to manage than they look. Don’t stand in them. it really is as simple as that. Don’t panic, they are easy to see, watch your feet until they are gone.
Hard mode! – The fight is ALMOST the same but hge has a LOT more health.
Stick to the same basics and ALWAYS watch your feet and focus the adds FIRST.
However two minor adjustments. The wall mechanic now fills one whole side. On regular it has a couple of aoes to avoid, in here you have a full sheet of them. Watch your feet.
The teleport mechanic. This is VERY dangerous…good luck using crushing shock to range interrupt, it WON’T work. When he teleports he now has a shield, so YES that means you MUST run to him as fast as possible, get INSIDE the shield and interrupt him right in his face!
TIPS:
Remember, it LOOKS more chaotic than it is and most of the stuff that will kill you, is literally on you.
Keep the boss still as much as you can, watch your feet, stay on interrupts and always kill adds first. NO dps check so take your time.
GOOD LUCK!